|
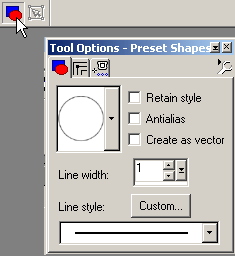
Open a new image about 300 x 300 Transparent Background 1.7 Million colors. On the 'Color Palette' set the foreground to Black and turn off the background. With the 'Preset Shapes' tool set as shown draw a circle 200 x 200 pixels. |
|
|||
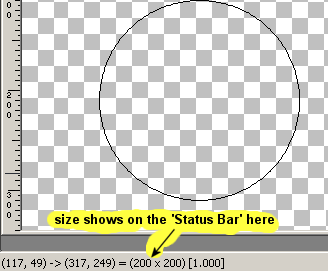
| Watch the 'Status' bar at the bottom to get the size correct | |||
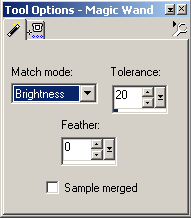
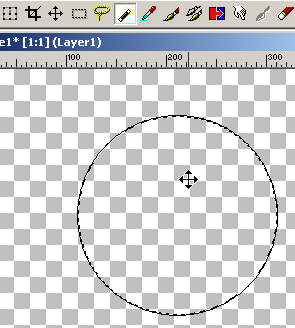
| With the 'Magic Wand' tool set up as shown click inside the circle. |
|
|||
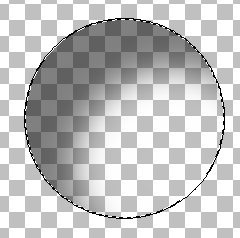
| We will keep this selection active until we are satisfied with all the shading. | |||
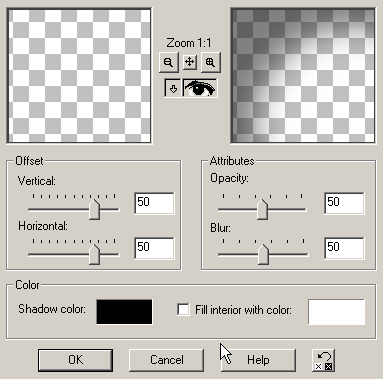
| Set the 'Cutout' tool ( found in 'Effects' > '3D Effects' ) as shown. |
|
|||
|
Add a 'New Raster Layer' found in 'Layers' Whenever using the 'Cutout' tool you must work on a new layer to prevent it wiping out what you have already done. |
|||
| Reset the 'Cutout' tool as shown for this new layer | 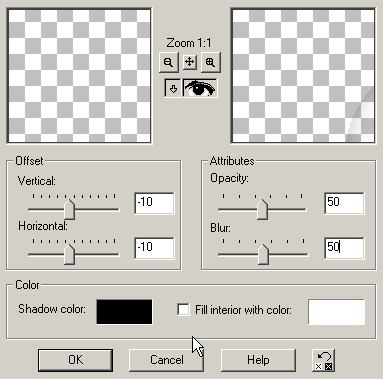
|
|||
| 'Merge Visible' 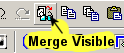 found in 'Layers' > 'Merge' Then 'Add a New Raster Layer'. |
|||
|
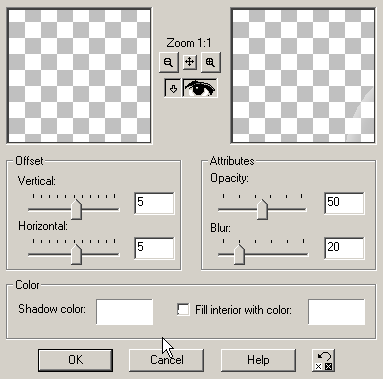
Reset the 'Cutout' tool again as shown. Note I changed the 'Shadow Color' to white to add a little back light at the top of the globe. |
|
|||
|
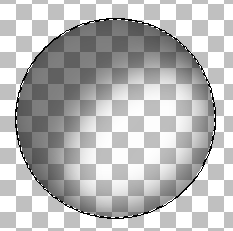
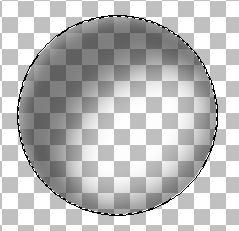
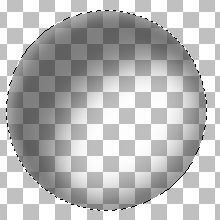
'Merge Visible' again. The shading is now complete so 'Invert' the selection 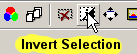 ( found in 'Selections' ) |
|||
Hit 'Delete' on your keyboard to get rid of the original circle we drew and then 'Select None' 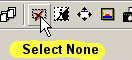 ( found in 'Selections' ) |
| |||
| 'Add a New Raster Layer'.
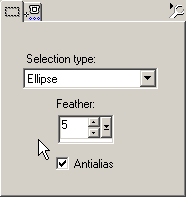
Click the 'Geometrical Selection' tool |
|
|||
|
||||
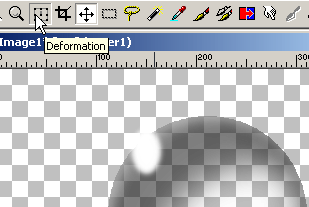
| Click the 'Deformation' tool |
|
|||
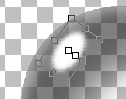
|
Rotate, adjust size and move the ellipse to the correct position with this tool. | |||
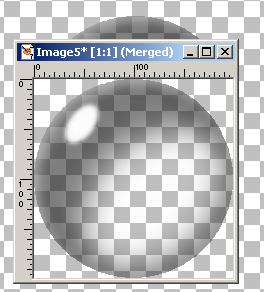
'Merge Visible' and copy the graphic to the clip board ( found in 'Edit' ) ( found in 'Edit' )
'Paste as a New Image' This gets rid of any transparent background not being used. |
|
|||
Export the new image as a 'Picture Tube'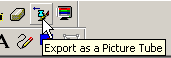 ( found in 'File' > 'Export' ) | 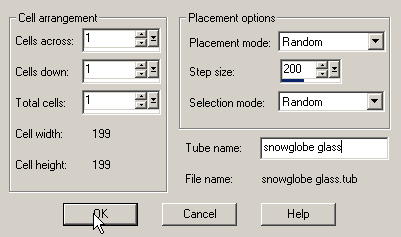
|
|||


 the ellipse.

